Classic Crochet Bucket Hat: Free Beginner Pattern
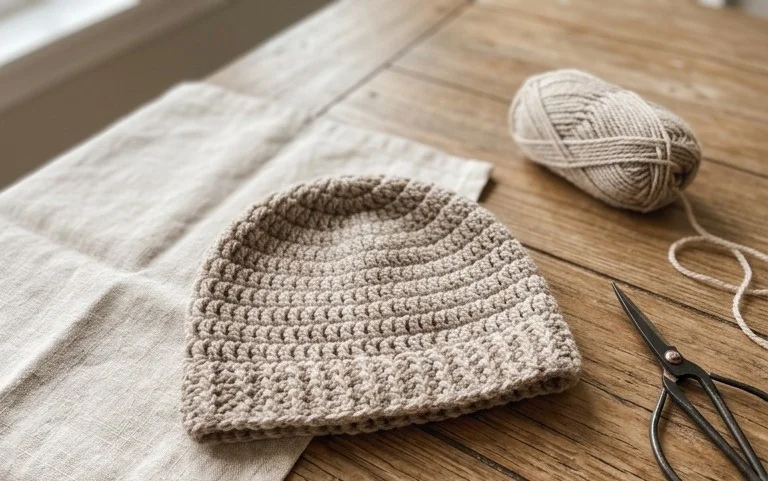
A handmade cotton bucket hat feels sturdy yet soft against the skin, offering just enough shade for sunny afternoons spent in the garden or at the beach. This style suits beginners perfectly because it relies on standard stitches that repeat in a rhythmic way, creating a solid fabric that maintains its shape without sagging. You will enjoy the satisfaction of building a functional accessory from a single ball of yarn as you learn to manage increases and maintain even tension. By following this guide, you gain confidence in working in rounds and shaping a piece that fits your specific measurements precisely.
Why You’ll Love This Pattern
The Classic Crochet Bucket Hat is a project that balances utility with style. It works up quickly using simple stitches, making it a great weekend project for both beginners and experienced makers. The structure provides excellent sun protection, and the design is lightweight enough to fold into a purse or backpack when you are on the go. Because it uses a simple increase sequence, it is easy to customize the fit to your head circumference by adjusting the number of rounds in the crown or the width of the brim.
I managed to finish this hat in a single Saturday afternoon. The instructions were very clear and the sizing was perfect for my head.
— Sarah, hobbyist crocheter
Pattern Overview & Skill Level
- Skill Level: Beginner
- Approximate Time: 3 to 4 hours
- Construction: Worked in joined rounds, starting from the center of the crown and working outward, then down the sides, and finishing with an increase-based brim.
- Finished Dimensions: Fits an average adult head (21 to 23 inches in circumference).
Materials & Supplies Needed
- Yarn: Worsted weight #4 cotton or cotton-blend yarn. Approximately 200 yards. Cotton is recommended for its durability and ability to hold a structured shape.
- Hook Size: 5.0 mm (H-8).
- Notions: Tapestry needle for weaving in ends, a locking stitch marker for tracking the start of rounds, and scissors.
- Yarn Substitutions: Acrylic yarn may be used, though it will produce a softer, less structured hat that may droop slightly compared to cotton. Avoid wool if you intend to wear the hat in warm weather as it does not breathe as well.
Stitch Guide & Abbreviations (US Terms)
- ch: Chain
- st/sts: Stitch/Stitches
- sl st: Slip stitch
- sc: Single crochet
- inc: Increase (work 2 sc in the same stitch)
- MR: Magic ring (or chain 3 and join with sl st to form a ring)
- BLO: Back loop only
Step-by-Step Pattern Instructions
Crown
- Rnd 1: Start with a MR, work 6 sc into the ring. Join with a sl st to the first sc (6 sts).
- Rnd 2: Ch 1, inc in each st around. Join (12 sts).
- Rnd 3: Ch 1, inc, 1 sc in next st repeat from * to * around. Join (18 sts).
- Rnd 4: Ch 1, inc, 1 sc in next 2 sts repeat from * to * around. Join (24 sts).
- Rnd 5: Ch 1, inc, 1 sc in next 3 sts repeat from * to * around. Join (30 sts).
- Rnd 6: Ch 1, inc, 1 sc in next 4 sts repeat from * to * around. Join (36 sts).
- Rnd 7: Ch 1, inc, 1 sc in next 5 sts repeat from * to * around. Join (42 sts).
- Rnd 8: Ch 1, inc, 1 sc in next 6 sts repeat from * to * around. Join (48 sts).
- Rnd 9: Ch 1, inc, 1 sc in next 7 sts repeat from * to * around. Join (54 sts).
- Rnd 10: Ch 1, inc, 1 sc in next 8 sts repeat from * to * around. Join (60 sts).
Sides
- Rnd 11: Ch 1, sc in the BLO of each st around. Join (60 sts).
- Rnd 12-24: Ch 1, sc in each st around. Join (60 sts).
Brim
- Rnd 25: Ch 1, inc, 1 sc in next 9 sts repeat from * to * around. Join (66 sts).
- Rnd 26: Ch 1, inc, 1 sc in next 10 sts repeat from * to * around. Join (72 sts).
- Rnd 27: Ch 1, inc, 1 sc in next 11 sts repeat from * to * around. Join (78 sts).
- Rnd 28: Ch 1, sc in each st around. Join (78 sts). Fasten off and weave in ends.
Care & Washing Instructions
- Hand wash in cool water with a mild detergent to prevent the hat from losing its shape.
- Gently squeeze out excess water using a towel; do not wring or twist the fabric.
- Lay flat on a clean surface or over a bowl to dry, ensuring the brim is shaped correctly.
Pro Tips & Common Mistakes to Avoid
- Maintain consistent tension throughout the project; use a smaller hook if your stitches look too loose, as the hat needs structural integrity.
- Place a stitch marker at the start of each round to keep track of your increases; this prevents the common mistake of skipping a stitch during the growth phases.
- Weave your yarn ends into the back of the work using a tapestry needle, moving in different directions to ensure they do not pull out during wear.
- Adjust the diameter of the crown by adding or omitting increase rounds if you need a custom fit; remember that every extra round adds 6 stitches to the total count.
Frequently Asked Questions
Can I use a different yarn weight for this pattern?
Changing the yarn weight will significantly alter the finished size. If you use a thicker or thinner yarn, you will need to adjust the number of increase rounds to match your desired head circumference.
Is this project suitable for a complete beginner?
Yes, this pattern uses only basic single crochet stitches and simple increases, making it an ideal choice for anyone learning the fundamentals of working in the round.
How do I adjust the hat to be smaller or larger?
To make the hat larger, continue the increase rounds in the crown until you reach the desired diameter. To make it smaller, stop the increase rounds earlier. Ensure your stitch counts remain consistent with the pattern progression.
Can I sell the finished hats made from this pattern?
You are welcome to sell items made from this pattern as long as you credit the original design and use your own photographs for the product listing.
Finishing this structured bucket hat gives you a versatile accessory that guards your eyes from the sun while keeping your outfit grounded in casual style. If you want to experiment, try using a variegated cotton yarn to create subtle stripes or add a band of contrasting color near the brim for a playful look. Please upload a photo of your work to show off your progress to the community. You can find more free patterns by browsing the other projects on the blog.